How to Ensure Compatibility of Replacement Parts?

Time:2026-09-25 Author:Ethan
0%

How to ensure compatibility of replacement parts starts with more than matching a part’s shape. A component may slide into place and still have the wrong voltage, pressure rating, material, or connector layout. Looks can mislead. Before ordering, record the equipment’s make, model, serial number, and the part number printed on the original component. Check the manufacturer’s manual or parts catalog, then compare the replacement’s specifications against the equipment requirements.

Small details matter. Measure the old part’s length and diameter, inspect thread direction, and note where mounting holes sit. For electrical components, compare voltage, current, pin arrangement, and connector type. For seals or hoses, confirm material and operating temperature range, not just overall size. A useful checklist can prevent avoidable returns, but it cannot replace verified specifications. If a listing gives only a photograph and a broad model description, ask the supplier for a datasheet or written confirmation. Even careful checks can miss a detail; a familiar-looking connector may conceal a different rating.

This guide explains how to compare part numbers, dimensions, materials, and performance requirements before buying. It also covers when an equivalent part may be suitable and when manufacturer guidance is essential. Keep packaging and documentation until the replacement has been checked and installed according to the equipment instructions. Measure twice. Compatibility is not always obvious, and uncertainty deserves another check.
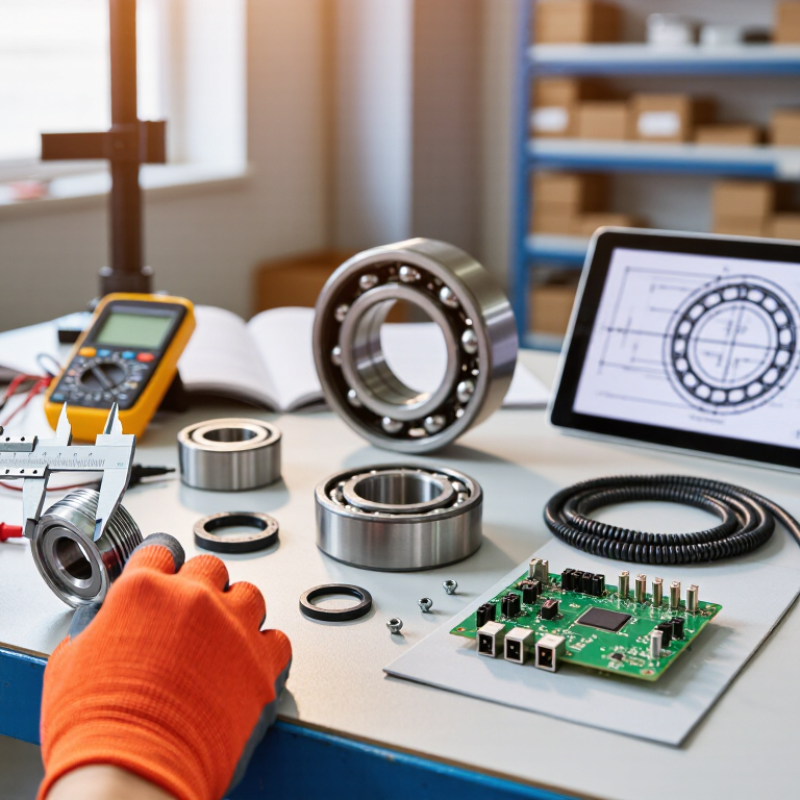
How to Ensure Compatibility of Replacement Parts?

Identify the Original Part and Its Key Specifications

A reliable replacement search starts with the part already installed, not a vague product description. Switch off the equipment and photograph the part in place, including its label, wire positions, and mounting points. Record the equipment model and serial number, then copy every code stamped on the component. Small suffixes matter. They can identify a different revision or fit.

Document the specifications that affect fit and operation. Measure length, diameter, hole spacing, and shaft shape with calipers when possible; note the units and measurement points. For electrical parts, record voltage, current, frequency, connector type, and pin layout. For seals or filters, check material, thickness, and flow direction. Compare your notes with a service manual or dimensional drawing instead of relying on a matching photo. Similar-looking parts can differ in one small detail, such as reversed connector keying. It is easy to overlook that. If a marking is worn or a measurement seems uncertain, pause and verify it before ordering. Check twice. A close fit alone does not prove compatibility.

Confirm the Equipment Model and Part Number

Confirm the equipment model before selecting a replacement part. Read the nameplate directly, not from an old order or handwritten note. Record the full model, serial range, and any suffix or revision. Small differences can indicate changes in voltage, fittings, dimensions, or internal design. Then compare the part number with the equipment manual or parts diagram. A near match is not proof of compatibility.

The 2024 industrial-sector report The True Cost of Downtime estimated that unplanned downtime can cost large industrial companies up to 11% of annual revenue. That figure does not isolate mismatched parts, but it shows why basic checks matter. Confirm that the listed number applies to your exact model and revision, and ask whether it has been superseded. Check connector shape, mounting points, and operating specifications against the removed part. Even a careful check can miss one digit. It happens. Keep a photo of the nameplate and the old part with the purchase record; those details make later verification easier.

How to Ensure Compatibility of Replacement Parts

Confirm the equipment model and part number before checking revision, dimensions, and interface.

Illustrative checklist example: 1 means verified; 0 means not yet verified. Confirm every item against the equipment documentation before installing a replacement part.

Compare Dimensions, Materials, and Performance Requirements

A replacement part can look correct and still fail at the mating surface. Measure the original part’s critical dimensions, including shaft diameter, shoulder length, hole spacing, and keyway width. Check more than one point; wear can make a used part misleading. Record tolerances and runout, not just nominal size. ASME Y14.5 provides a framework for communicating dimensions and geometric tolerances, helping suppliers and technicians compare parts consistently. A caliper reading is not the whole story.

Material and performance matter just as much. Match the alloy, hardness, corrosion resistance, and temperature range to the actual operating environment. For example, a seal exposed to hot lubricant may need different properties from one used in a cool, dry assembly. Compare rated load, speed, pressure, and duty cycle with the equipment’s requirements. The U.S. Department of Energy’s Operations & Maintenance Best Practices Guide reports potential predictive-maintenance savings of 8–12% over preventive maintenance and up to 40% over reactive maintenance. Those figures are not a guarantee for any single part, but they underline the cost of overlooking condition and fit. When specifications are incomplete, pause and verify them; guessing is tempting, and sometimes the old part is already distorted.

How to Ensure Compatibility of Replacement Parts? - Compare Dimensions, Materials, and Performance Requirements

Use this comparison as a screening guide. Confirm the equipment drawing, operating conditions, and applicable standard before ordering or installing a replacement.

Part and reference specification Dimensions to verify Original requirement Replacement example Material and operating conditions Performance checks Compatibility result
Hexagon-head bolt
ISO 4017; property class defined under ISO 898-1
M8 thread; 1.25 mm pitch; 30 mm nominal length measured from under the head M8 × 1.25 × 30 mm; property class 8.8 M8 × 1.25 × 30 mm; property class 8.8; matching head style and thread form Steel fastener. Match the required coating and corrosion resistance; avoid mixing finishes where the joint specification prohibits it. Class 8.8 specifies minimum tensile strength of 800 MPa and minimum yield strength of 640 MPa. Check joint design, engagement length, and specified tightening method. Compatible if verified
Dimensions and class match; confirm coating and joint requirements.
Deep-groove ball bearing
Designation 6204
Bore 20 mm; outside diameter 47 mm; width 14 mm 6204 envelope dimensions; required internal clearance, sealing arrangement, and load capacity set by the equipment design 6204 with matching 20 × 47 × 14 mm dimensions, seal or shield configuration, and specified clearance Bearing steel is common. Grease type, temperature range, contamination exposure, and lubrication method must suit the application. Compare the candidate’s published basic dynamic and static load ratings, permissible speed, and clearance with the equipment requirements. These ratings can vary by design and manufacturer. Conditional
Matching dimensions alone do not establish load, speed, or lubrication compatibility.
O-ring
AS568 size -214
Nominal inside diameter 25.00 mm; nominal cross-section 3.53 mm Size -214; compound selected for the fluid, temperature, pressure, and gland design Same nominal size and a compound specifically rated for the service fluid and temperature Elastomer choice is application-dependent. For example, EPDM is commonly used for hot water, while NBR is commonly used for many petroleum-oil applications; neither is suitable for every fluid or condition. Check fluid compatibility, temperature limits, pressure and extrusion conditions, hardness, and gland dimensions. Confirm the compound’s documented service limits. Conditional
Correct size is necessary, but the compound must also suit the service.
Plain washer
ISO 7089, size M8
Nominal inside diameter 8.4 mm; outside diameter 16 mm; thickness 1.6 mm M8 washer to the required dimensional series, material, and hardness ISO 7089 M8 washer with matching dimensions and specified material or property requirements Material and finish should be compatible with the bolt, the joined materials, and the environment. Check bearing area, load distribution, hardness, corrosion protection, and whether the joint design requires a different washer type. Compatible if verified
Confirm the required washer series and material before use.
O-ring compound substitution
Same AS568 size -214
Nominal inside diameter 25.00 mm; nominal cross-section 3.53 mm EPDM compound in a hot-water application, subject to the original temperature and pressure limits Same-size NBR O-ring offered as a direct dimensional substitute NBR is not automatically interchangeable with EPDM for hot-water service. Suitability depends on the specific compound and actual operating conditions. Do not approve based on dimensions alone. Obtain documented fluid-compatibility and temperature ratings for the exact compound. Not approved as-is
Material compatibility has not been established.

Check Manufacturer Guidance and Compatibility Listings

Before ordering, match the part to the exact vehicle configuration. Use the full vehicle identification number where available, then confirm model year, engine, trim, drivetrain, and production date. Small differences matter. An identical-looking sensor may have a different connector or calibration.

S&P Global Mobility reported that the average age of U.S. light vehicles reached 12.6 years in 2024, reflecting a diverse fleet with many configurations. The figure comes from its 2024 vehicle-age analysis.

Check the vehicle manufacturer’s parts catalog and service instructions, not just a seller’s brief description. Verify the listed position, engine code, build-date limits, superseded part numbers, and any required companion hardware. Compare the catalog details with the original part: bolt spacing, hose angle, connector pins, and dimensions. Do not guess.

Cross-reference listings are useful, but may miss midyear changes or trim-specific exceptions. If sources disagree, ask a qualified parts specialist to check the vehicle identification number and catalog notes before installation. Listings can be incomplete, so save the fitment details and confirm the return policy.

Test the Replacement Part After Installation

How to Ensure Compatibility of Replacement Parts?

Test the Replacement Part After Installation

A replacement part can fit neatly and still perform incorrectly. After installation, inspect its position, fasteners, seals, and connections. Nothing should be forced or left loose. Follow the equipment’s service instructions before powering it on. Start with a brief, low-load test, if the procedure allows. Watch for delayed response, unusual vibration, leaking, or a new clicking sound. Stop immediately if anything binds or behaves differently than expected.

A common mistake is treating a successful start as proof of compatibility. Test the part through several normal operating cycles, then check it under its intended working conditions. Compare readings or indicators with the equipment’s stated limits, and check for unexpected heat after shutdown. Isolate power before making adjustments. A snug fit can hide a mismatch. It is easy to rush this check, especially when the equipment seems to work.

Tips: Keep the first test short and stay near the equipment. Use suitable protective gear, and have the service instructions available. Note any unusual sounds or readings; small details can help identify a fit or setup problem.

FAQS

Which dimensions should I measure when comparing replacement parts?

Measure shaft diameter, shoulder length, hole spacing, and keyway width. Check more than one point because wear can distort the original part. A caliper alone? Not quite.

Which material properties should match?

Compare alloy, hardness, corrosion resistance, and temperature range with the operating environment. A seal exposed to hot lubricant may need different properties from one in a cool, dry assembly.

Which performance ratings matter?

Check rated load, speed, pressure, and duty cycle against equipment requirements. A part may fit but still be unsuitable under working conditions.

What should I do if specifications are incomplete?

Pause and verify the missing details before choosing. Do not guess from appearance; the old part may already be distorted.

What should I inspect after installation?

Check the part’s position, fasteners, seals, and connections. Nothing should be forced or left loose. Small gaps matter.

How should I test a replacement part?

Follow the service instructions and begin with a brief, low-load test if allowed. Watch for leaks, vibration, delayed response, or clicking. Stop if anything binds.

Is a successful start enough to confirm compatibility?

No. Test several normal cycles, then check intended working conditions. Compare readings with equipment limits and look for unexpected heat after shutdown.

What safety steps help during testing?

Stay near the equipment, use suitable protective gear, and keep service instructions available. Isolate power before adjustments. Note unusual sounds or readings.

Can predictive maintenance reduce costs?

One maintenance guide reports potential savings of 8–12% over preventive maintenance and up to 40% over reactive maintenance. These figures are not guarantees for a single part.

Conclusion

How to ensure compatibility of replacement parts begins with identifying the original component and recording its key specifications. Confirm the equipment’s exact model and the part number, since similar-looking components may not fit or perform the same way. Then compare the replacement’s dimensions, materials, connection points, and performance requirements with those of the original. These details help prevent installation problems and reduce the risk of poor operation or premature wear.

Before purchasing, review the equipment documentation and any compatibility listings provided for the replacement part. After installation, test the equipment under normal operating conditions. Check that the part is securely fitted, functions as expected, and does not cause unusual noise, movement, or performance changes. Taking these steps helps ensure the replacement suits the equipment and supports reliable operation.

Ethan

Ethan

Ethan is a seasoned marketing professional with a deep expertise in our company's innovative product line. With a passion for sharing knowledge and insights, he takes the lead in regularly updating our corporate blog, where he explores industry trends, product features, and effective marketing......