How to Fix Common Problems Caused by Low Quality Parts?

Time:2026-09-10 Author:Amelia
0%

Low quality parts can turn a minor maintenance issue into repeated downtime, safety concerns, and unnecessary repair costs. A loose bearing may produce a faint hum before it creates damaging vibration. A poorly molded seal can harden early, allowing oil or coolant to escape. These failures often appear unrelated, yet the part itself may be the common cause. Understanding How to solve common faults caused by inferior parts requires more than replacing visible damage.

This guide draws on practical maintenance experience, manufacturer specifications, and disciplined inspection methods. It explains how to identify warning signs, confirm failure causes, and choose dependable replacement parts. Technicians should compare dimensions, materials, load ratings, certificates, and batch records before installation. A correct-looking component is not always a reliable component. Check the small details.

Photographs, torque readings, temperature logs, and vibration measurements can reveal patterns that memory misses. Testing the surrounding system also matters, because a stronger part may still fail under incorrect alignment or excessive load. No repair plan is perfect. Even experienced teams overlook a contaminated fitting or an incorrect storage condition. That weakness deserves attention, not concealment.

The aim is practical and evidence-based guidance. Readers will learn when cleaning is enough, when replacement is necessary, and when a supplier should be questioned. Reliable maintenance protects equipment, workers, production schedules, and long-term operating budgets. Careful decisions today can prevent the same fault from returning tomorrow.
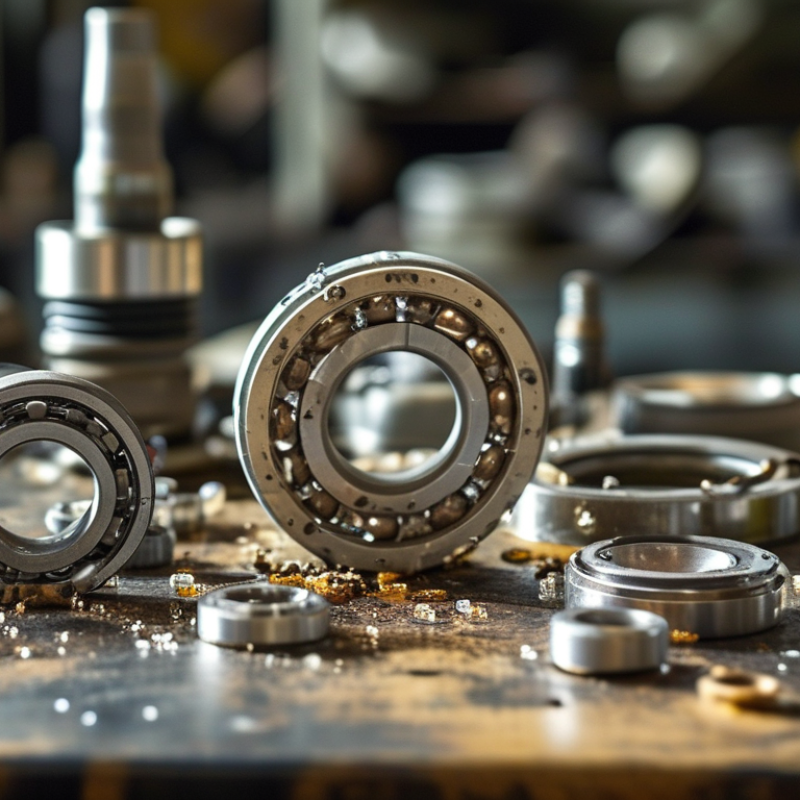
How to Fix Common Problems Caused by Low Quality Parts?

Identify Symptoms Caused by Low-Quality Parts

Low-quality parts rarely fail without warning. During field inspections, heat, noise, and uneven movement often appear first. A bearing may feel gritty before producing a sharp sound. A connector may loosen after repeated vibration, causing intermittent power loss. Discoloration, cracked insulation, burrs, and weak threads also deserve attention. These details can look minor. They are not.

Measure symptoms instead of relying only on sight. Compare operating temperature with previous service records. Check voltage stability, current draw, alignment, and fastening torque. A poor seal may leave a thin oily ring around a shaft. A weak filter can reduce flow and leave fine debris downstream. Repeated resets, unusual odors, or delayed responses may indicate material or dimensional problems. Diagnosis is not always clean. I once blamed a noisy coupling, then found a bent mounting surface. That mistake changed my inspection routine.

Tips: Photograph the part before removal. Record its dimensions, temperature, sound, and failure time. Use calibrated gauges whenever possible. Compare a suspect part with a verified sample. If symptoms disappear after replacement, inspect nearby components too. The first failed part may only be the victim.

Trace the Root Cause of the Component Failure

When a component fails early, replacing it is often the easiest wrong decision. Trace the root cause before ordering another part. Start with the failure scene: cracked housing, darkened terminals, loose pins, or unusual heat marks. Photograph each detail and record operating hours, load, temperature, vibration, and installation date. A maintenance log can reveal patterns that memory misses. Do not guess. A part may appear defective while excessive current, poor alignment, or contamination caused the damage.

Separate evidence from assumptions. Compare the failed component with an unused sample and a known-good unit. Check dimensions, material markings, connector fit, resistance, insulation, and response under controlled conditions. Use calibrated instruments, and record the test setup. If the result changes after cleaning or reseating, the component may not be the primary cause. Trace upstream power, protection devices, mounting pressure, and cooling paths. One field investigation found repeated terminal failures after a fastening tool was set too tightly. The parts looked weak, but installation stress created hidden cracks.

Review supplier documents, incoming inspection results, and batch records without blaming a source too quickly. A single failed sample cannot prove a production defect. Retest samples from different batches when possible. Also question the test itself; an overlooked cable fault once distorted our measurements. That mistake delayed the repair. Corrective action should address the proven mechanism, such as torque control, filtration, thermal spacing, or circuit protection. Keep the evidence trail clear enough for another engineer to challenge it.

Choose Reliable Replacement Parts

How to Fix Common Problems Caused by Low Quality Parts?

Choose Reliable Replacement Parts

Low-quality replacement parts often fail quietly. A weak seal may leak after several heat cycles. A poorly machined bearing can create vibration, noise, and uneven wear. The 2023 World Quality Report found that quality assurance remains a major operational priority for many organizations, especially as systems become more complex. That lesson applies to replacement parts: low purchase prices can hide inspection, labor, and downtime costs.

Choose suppliers that provide traceable specifications, material details, inspection records, and warranty terms. Ask whether the part was tested under realistic temperature, pressure, or load conditions. ISO 9001-based quality systems can support consistency, but certification alone is not proof of perfect performance. Check the actual batch documentation. In my experience, this step is often skipped when a repair feels urgent. That is a mistake worth reconsidering.

Tips: Compare dimensions, tolerances, materials, and operating limits before ordering. Keep the original failed part for inspection. Photograph cracks, discoloration, or unusual wear. Read independent test data, not only sales claims. The U.S. Department of Energy’s Operations and Maintenance Best Practices Guide notes that preventive maintenance can reduce failures and improve equipment reliability. Still, even a reliable part can fail when installed incorrectly. Verify torque, alignment, lubrication, and fit. Small details matter.

How to Fix Common Problems Caused by Low Quality Parts? - Choose Reliable Replacement Parts

Common Problem Typical Symptoms Likely Low-Quality Part Issue Reliable Replacement Criteria Useful Technical Check Expected Benefit
Premature wear Excessive play, scoring, deformation, or reduced service life Incorrect material hardness, poor heat treatment, weak surface finish, or inadequate lubrication compatibility Specified material grade, documented hardness range, controlled surface finish, and traceable inspection records Compare hardness, dimensions, and surface roughness with the engineering drawing and application requirements More consistent wear resistance and lower replacement frequency
Frequent leakage Drips, pressure loss, fluid contamination, or visible seal deformation Poor elastomer quality, incorrect seal dimensions, compression set, or incompatibility with the working fluid Correct seal profile, verified temperature and chemical compatibility, and controlled dimensional tolerances Check seal size, groove dimensions, operating temperature, pressure, and fluid compatibility before installation Improved sealing reliability and reduced maintenance interruptions
Excessive vibration or noise Rattling, humming, uneven rotation, or increased vibration readings Poor balance, inaccurate geometry, excessive clearance, misalignment, or inadequate bearing quality Balanced rotating components, controlled runout, correct internal clearance, and verified dimensional conformity Measure shaft runout, mounting alignment, radial play, and vibration at the normal operating speed Quieter operation and lower stress on connected components
Overheating Discoloration, thermal shutdown, odor, lubricant breakdown, or shortened component life High friction, excessive electrical resistance, poor thermal conductivity, or unsuitable operating temperature rating Verified temperature rating, low-friction design, suitable insulation, and adequate heat dissipation Record temperature under normal load and compare it with the part's specified operating range Lower thermal stress and improved operational stability
Electrical failure Intermittent operation, voltage drop, arcing, blown protection devices, or unstable signals Poor conductor connections, insufficient insulation, weak terminals, or incorrect current and voltage ratings Correct voltage and current rating, secure terminals, suitable insulation class, and verified continuity Check continuity, insulation resistance, terminal tightness, polarity, and load current Fewer intermittent faults and safer electrical performance
Corrosion or discoloration Rust, pitting, surface flaking, contact resistance, or loss of mechanical strength Unsuitable base material, inadequate coating thickness, poor surface preparation, or exposure beyond the design environment Material and coating selected for humidity, chemicals, salt exposure, and required service temperature Verify material, coating condition, environmental exposure, and any applicable corrosion-resistance test data Longer service life in demanding environments
Poor fit or difficult installation Misalignment, excessive force during assembly, loose fit, or recurring fastener loosening Dimensional variation, incorrect thread form, warped surfaces, or missing installation specifications Controlled tolerances, verified thread and interface dimensions, clear orientation features, and installation instructions Measure critical dimensions, thread pitch, flatness, concentricity, and required assembly torque Faster installation and reduced assembly damage
Inconsistent performance between batches Different output, fit, durability, or calibration results from otherwise identical parts Uncontrolled production variation, insufficient sampling, or missing lot traceability Defined acceptance criteria, batch identification, inspection reports, and a documented quality-control process Request lot-level measurements for critical dimensions and test results for functional characteristics More predictable quality and simpler incoming inspection
Safety-related malfunction Unexpected release, structural cracking, loss of braking or control function, or failure under load Insufficient load rating, poor material integrity, incorrect design assumptions, or lack of validation testing Documented load and environmental ratings, appropriate safety margin, material verification, and application-specific testing Confirm rated load, duty cycle, failure mode, installation orientation, and inspection requirements Reduced risk of hazardous failure and unplanned downtime
Replacement selection checklist: Match the original specifications, verify material and dimensions, confirm operating limits, request inspection or test records, and check lot traceability before installation.

Install and Test the New Components

Low-quality parts often create unstable connections, excess heat, and repeated faults. Replacing them is only half the repair. Installation must follow the component drawing, torque specification, and environmental limits. Before touching the system, record the original fault, wire positions, connector condition, and visible damage. A clear baseline prevents guesswork later.

Fit the new component on a clean, dry surface. Check the part number, dimensions, polarity, and mounting points twice. Use a calibrated torque tool where required. Loose fasteners can cause vibration, while excessive force may crack housings or distort contacts.

Uptime Institute’s 2023 Global Data Center Survey reported that nearly two-thirds of operators experienced an outage during the previous three years. Poor installation and human error remain practical risks, even with reliable equipment.

Test in stages. First, inspect continuity, insulation, and grounding with suitable instruments. Then power the system at low load and watch temperature, noise, current, and vibration. Increase the load gradually. A thermal camera can reveal a hot terminal before failure becomes visible. Record readings after ten minutes and again after one hour.

Do not trust a single successful start. In practice, I have seen replacement parts pass a bench test but fail after vibration or heat. That result is uncomfortable, but useful. It shows the test was too gentle.

The 2024 World Quality Report identifies test automation and stronger quality controls as major reliability priorities, yet human inspection still matters at every connection.

Prevent Future Problems Through Quality Control

How to Fix Common Problems Caused by Low Quality Parts?

Low quality parts often reveal themselves through noise, loose fittings, overheating, or repeated failures. In field repairs, I have found that replacing one damaged part is rarely enough. Technicians should inspect nearby connectors, mounting points, seals, and cables for hidden stress. A simple checklist helps record serial details, visible wear, test readings, and installation conditions.

Quality control prevents these problems before parts reach production. Set clear acceptance standards for dimensions, materials, electrical performance, and surface defects. Each shipment should receive sampling checks, while critical parts need complete inspection. Measure tolerances with calibrated tools, not visual judgment alone. Keep inspection records with supplier data, batch numbers, test results, and photographs. This evidence supports reliable decisions when a failure appears months later.

Test parts under realistic conditions. Apply vibration, heat, moisture, repeated movement, or load when the application requires it. A part that passes a bench test may fail inside a hot, dusty enclosure.

Staff should follow written procedures and receive regular training. Still, procedures can become outdated. Review them after every serious defect, even when production pressure is high.

I once approved a replacement after checking its dimensions but missed its weaker coating. That mistake showed why quality control must examine function, durability, and context together. Small warning signs matter.

FAQS

: Why should I investigate a failed component before replacing it?

: Replacement may hide the real cause. Inspect cracked housings, dark terminals, loose pins, and heat marks. Record load, temperature, vibration, and operating hours. Do not guess.

What evidence should I collect at the failure site?

Photograph visible damage from several angles. Record the installation date, operating conditions, and recent maintenance. Keep the failed part for later inspection. Small details can expose repeated patterns.

How can I tell whether the component caused the failure?

Compare it with an unused sample and a known-good unit. Check dimensions, markings, connector fit, resistance, insulation, and controlled response. Use calibrated instruments. Record the test setup.

What external problems can damage a replacement part?

Excessive current, poor alignment, contamination, vibration, weak cooling, and incorrect mounting pressure can cause failure. Trace upstream power and protection devices. A tight fastener can create hidden cracks.

How should I evaluate replacement-part quality?

Request traceable specifications, material details, inspection records, batch information, and warranty terms. Compare tolerances and operating limits. Independent test data is more useful than sales claims.

Does certification guarantee reliable performance?

No. Certification supports a quality system, but it does not prove perfect performance. Review actual batch records and test conditions. This step is often skipped during urgent repairs.

What should I check before installing a new component?

Confirm the part number, dimensions, polarity, mounting points, connector condition, and wire positions. Use a clean, dry surface. Check alignment, lubrication, fit, and torque. Small details matter.

How should I test the installed component?

Begin with continuity, insulation, and grounding checks. Power the system at low load. Watch temperature, current, noise, and vibration. Increase load gradually. Test slowly.

Is one successful startup enough?

No. Record readings after ten minutes and one hour. Use thermal imaging when possible. A part may pass a bench test but fail after heat or vibration. Our test may have been too gentle.

Conclusion

Low-quality parts can cause recurring equipment problems, including unstable performance, unusual noise, overheating, inaccurate readings, and premature wear. Learning how to solve common faults caused by inferior parts begins with identifying clear symptoms and documenting when and how the failure occurs. Technicians should then trace the root cause by checking installation conditions, operating loads, maintenance records, and related components instead of replacing parts without investigation.

Once the cause is confirmed, choose reliable replacement parts that match the equipment’s specifications, operating environment, and safety requirements. Install each component correctly, inspect connections, and test the system under controlled conditions before returning it to normal use. To prevent similar failures, establish quality-control procedures such as supplier evaluation, incoming inspections, compatibility checks, routine maintenance, and performance monitoring. These steps can improve reliability, reduce repeated repairs, control long-term costs, and extend the service life of the entire system.

Amelia

Amelia

Amelia is a seasoned marketing professional with a wealth of expertise in our company’s core offerings. With an unwavering passion for driving growth and innovation, she plays a pivotal role in shaping our marketing strategies and enhancing brand visibility. A key aspect of her responsibilities......