How to Store Auto and Mechanical Parts Properly?

Time:2026-09-20 Author:Mason
0%

How to Store Auto and Mechanical Parts Properly begins with one practical truth: storage is part of maintenance. A clean shelf cannot rescue a part damaged by moisture, pressure, heat, or careless handling. James E. Duffy, an automotive technology educator and author, teaches a useful principle: “Keep parts clean and protected from contamination.” That idea applies to engines, bearings, brake components, seals, fasteners, and electrical assemblies.

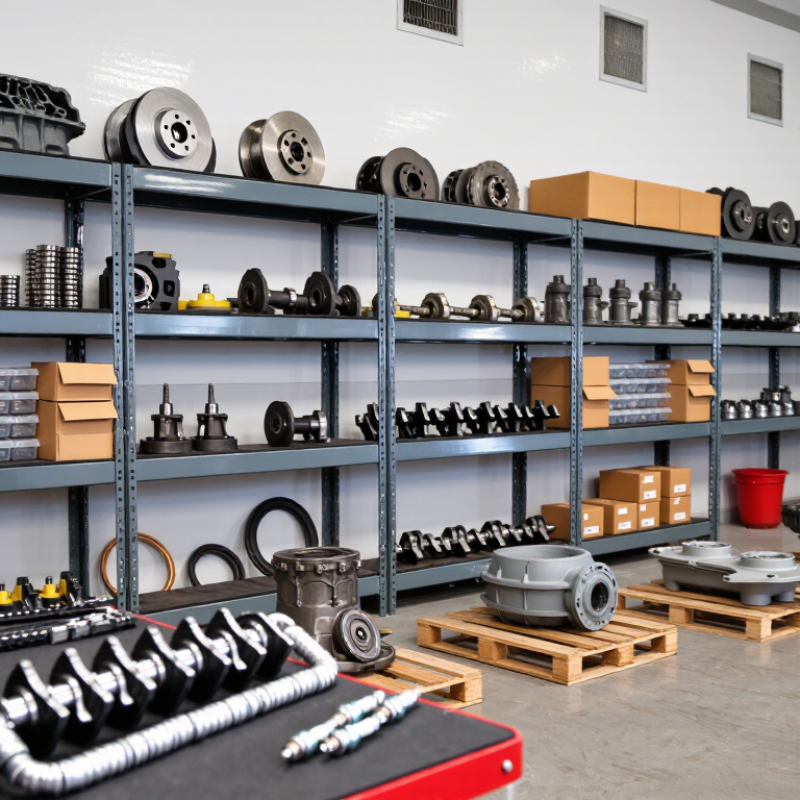
This guide explains How to store auto and mechanical parts properly in workshops, warehouses, and private garages. It focuses on real conditions, not perfect storage rooms. Parts should be cleaned before shelving, then wrapped with suitable rust protection. Steel components need dry locations and stable temperatures. Rubber seals should stay away from sunlight, ozone sources, and excessive heat. Bearings should remain sealed until installation. Heavy items need low shelves, while delicate pieces require rigid boxes and clear labels.

Small details matter. A damp concrete floor can corrode metal overnight. Dust can enter an uncovered gearbox. A missing date label can turn usable stock into uncertain stock. It is easy to over-organize and still overlook ventilation. That is where many storage plans fail. I would also challenge one common assumption: sealed packaging is not always safe. Trapped condensation can create hidden corrosion.

Use inspection records, rotate older stock, and check packaging regularly. Take photographs when condition matters. Store carefully. Review honestly. Even experienced technicians miss something occasionally, so the system should make mistakes visible before installation.
How to Store Auto and Mechanical Parts Properly?

Identify Parts and Their Specific Storage Requirements

Identify Parts and Their Specific Storage Requirements

Proper storage begins with accurate identification, not shelf space. Read the part number, revision code, material, and application before placing anything. A brake rotor may resemble another model, yet its diameter and mounting pattern can differ. Photograph unusual parts and record dimensions. Small labels save large delays.

Separate rubber seals, electrical components, fasteners, and heavy metal assemblies. Rubber should stay cool, dry, and away from direct sunlight. Batteries and fluids require controlled areas, spill protection, and clear hazard labels. Use covered bins for bearings and precision components. Keep machined surfaces lightly protected against corrosion, but inspect that protection regularly. Sometimes, “rust-free” is only an assumption.

The WERC 2024 DC Measures report lists median order-picking accuracy at about 99.5%, showing how disciplined identification supports reliable fulfillment. That remaining error rate still matters in a mechanical storeroom. One incorrect gasket can stop an entire repair. Scan labels where possible, but verify critical dimensions manually. OSHA’s material-handling guidance also requires stable stacking and unobstructed aisles, which reduces struck-by and falling-object risks. Store heavy parts below waist level when practical. Keep fast-moving items near the issue counter. Review inactive stock monthly. I have seen teams trust old labels too much. Recheck them. Parts change, packaging changes, and memory fails.

Clean, Dry, and Prepare Parts Before Storage

Clean, dry preparation determines whether stored automotive and mechanical parts remain serviceable. Dirt traps moisture against steel, while fingerprints leave salts that accelerate corrosion. The AMPP IMPACT study estimated global corrosion costs at approximately $2.5 trillion annually, equal to about 3.4% of global GDP. Storage discipline protects more than appearance.

Remove grease, road dust, and metal particles with a compatible cleaner. Do not soak electrical components or sealed bearings unnecessarily.

Blow parts dry with filtered air, especially around threads, keyways, and bolt holes. A clean-looking part may still hold moisture inside a blind hole. I have missed that detail before.

Apply a light corrosion-inhibiting film to unpainted steel, then wrap parts with vapor-resistant material. Add desiccant inside sealed containers, but avoid direct contact with sensitive surfaces. ISO 9223 identifies humidity, temperature, and airborne contaminants as major factors in atmospheric corrosivity. Keep storage areas dry, elevated, and away from concrete floors. Record the part number, cleaning date, coating used, and inspection schedule. Labels fade. Use a secondary record.

Store rubber seals away from ozone-producing electrical equipment and direct sunlight. Keep machined surfaces separated with clean, non-abrasive barriers.

Check stored parts monthly for condensation, odor, staining, or damaged packaging. Monthly checks may feel excessive. They are cheaper than discovering seized components during assembly.

Choose Suitable Containers, Shelving, and Protective Materials

Proper storage begins with choosing containers that match the part, not the other way around. Small fasteners, clips, and electrical connectors belong in labeled, compartmented boxes. Use rigid containers with secure lids for heavy metal components. Clear walls help identify contents without repeated opening. However, transparent plastic can become brittle in sunlight, so dark storage areas are safer.

Shelving must support the actual load and leave enough space for handling. Place dense parts on lower levels to reduce tipping risks. Adjustable shelves work well when parts change in size. Keep aisles clear and avoid stacking containers beyond comfortable reach.

I once stored several brake components too high, and finding one became unnecessarily awkward. That mistake changed my layout.

Protective materials prevent scratches, corrosion, and contamination. Wrap polished surfaces with lint-free paper or soft foam. Add moisture-absorbing material inside sealed containers when humidity is a concern. Do not let rubber parts press against solvents, sharp edges, or direct heat. Use dividers to stop metal pieces from striking each other.

Labels should include the part name, size, quantity, and storage date. I still occasionally find an old label that is too vague. Clearer records would have saved time.

Inspect containers and shelves regularly for cracks, rust, dust, or shifting loads.

Control Temperature, Humidity, Light, and Contamination

How to Store Auto and Mechanical Parts Properly?

Temperature and humidity deserve daily attention, not occasional adjustment. Keep most metal parts in a stable, dry room, ideally around 15–25°C and 40–60% relative humidity. Avoid placing cartons against exterior walls or concrete floors. Temperature swings create condensation inside sealed bags and housings. A low-cost data logger can reveal these changes better than a wall thermometer.

The NACE IMPACT study estimated global corrosion costs at about $2.5 trillion annually, equal to roughly 3.4% of global GDP. Small leaks matter.

Light also damages storage quality. Direct sunlight can heat steel surfaces, fade labels, and weaken rubber, plastic, and painted coatings. Use opaque curtains or covered racks, while allowing enough airflow around parts. Store precision components in clean, closed containers with compatible corrosion protection.

Dust, oil mist, salt, and grinding debris should stay away from open assemblies. ISO 14644-1 shows why particle control matters: clean environments are classified by airborne particle concentration, not by visual appearance alone. A room may look clean and still contaminate bearings or hydraulic surfaces.

Inspect shelves, packaging, and desiccant records at a fixed interval. Replace damaged wrapping immediately. Do not stack heavy parts on fragile seals. In practice, perfect control is rarely achieved; I would rather document a brief humidity excursion than hide it. That record may expose a weak door seal, an overloaded rack, or an unrealistic storage target.

Keep it boring. Keep it measurable.

Label, Organize, Inspect, and Rotate Stored Parts

How to Store Auto and Mechanical Parts Properly?

A reliable storage system begins with clear labels. Record the part name, size, material, quantity, and purchase date. Add a simple location code, such as Rack B, Bin 4. Use durable labels that resist oil, dust, and changing temperatures. Handwritten notes fade faster than expected. I learned this after misidentifying two similar bearings during a repair.

Organize parts by function, size, and handling needs. Keep fasteners in divided containers, seals in clean drawers, and heavy components on lower shelves. Store electrical parts away from moisture and direct sunlight. Place fragile items in padded containers, not loose piles. Leave walking space around shelves. A tidy cabinet is useful, but my first layout was too crowded and slowed access.

Inspect stored parts on a regular schedule. Look for rust, cracked rubber, bent edges, leaking fluid, and damaged packaging. Test critical items according to their technical requirements before installation. Record each inspection, even when nothing seems wrong. Rotate stock by moving older parts toward the front and newer parts behind them. This reduces aging and forgotten inventory. Rubber components may harden, while lubricants can separate over time. Set a review date. Keep damaged parts clearly isolated. One overlooked seal can delay an entire repair, and that lesson is easy to underestimate.

How to Store Auto and Mechanical Parts Properly?

Label, organize, inspect, and rotate stored parts to improve inventory accuracy and reduce avoidable storage damage.

The chart shows a practical 100-point storage-control score for four essential activities. Clear labeling and organized locations support fast identification, while scheduled inspections and FIFO rotation help prevent deterioration, obsolete stock, and unnecessary replacement costs.

FAQS

What containers are suitable for small mechanical parts?

Use labeled, divided boxes for fasteners, clips, and electrical connectors. Clear walls help identify contents quickly. Secure lids matter.

How should heavy components be stored?

Use rigid containers with strong lids. Place dense parts on lower shelves to reduce tipping risks. Do not stack beyond comfortable reach.

Where should storage shelves be placed?

Leave clear aisles around shelving for safe handling. Adjustable shelves help when part sizes change. My first layout was too crowded.

How can stored parts be protected from damage?

Wrap polished surfaces with lint-free paper or soft foam. Use dividers to prevent metal pieces from striking each other. Keep rubber away from heat and sharp edges.

What information should appear on a storage label?

Include the part name, size, material, quantity, and purchase date. Add a location code, such as Rack B, Bin 4. Vague labels waste time.

How should similar parts be organized?

Group parts by function, size, and handling needs. Keep seals in clean drawers and fasteners in divided containers. Store fragile items in padded containers.

How often should stored parts be inspected?

Set a regular review schedule. Check for rust, cracked rubber, bent edges, dust, and damaged packaging. Record every inspection, even when nothing appears wrong.

Why should older parts be moved forward?

Place older stock in front and newer stock behind it. This reduces forgotten inventory and aging. Rubber can harden, while lubricants may separate.

How should electrical and moisture-sensitive parts be stored?

Keep electrical parts away from moisture and direct sunlight. Use sealed containers when humidity is a concern. Add moisture-absorbing material when appropriate.

What should happen to damaged parts?

Isolate damaged parts clearly from usable inventory. Test critical items according to their technical requirements before installation. One overlooked seal can delay repairs.

Conclusion

How to store auto and mechanical parts properly begins with identifying each component and understanding its specific storage needs. Before putting parts away, remove dirt, grease, moisture, and corrosive residue, then dry them completely. Apply suitable protective coatings where necessary, especially to exposed metal surfaces. Choose strong containers, shelves, and protective materials that support the part’s weight without causing scratches, pressure, or deformation. Sensitive components should be protected from dust, impact, and static buildup when appropriate.

A stable storage environment is equally important. Keep parts away from excessive heat, cold, humidity, direct light, chemicals, and airborne contaminants. Use clear labels that show the part name, quantity, condition, and storage date, and arrange items so frequently used components remain easy to access. Conduct regular inspections for rust, cracks, leaks, packaging damage, or other deterioration. Rotate inventory by using older suitable parts first and updating records whenever items are moved, repaired, or replaced. This organized approach helps preserve quality, improve efficiency, and reduce unnecessary waste.

Mason

Mason

Mason is a seasoned marketing professional with a deep expertise in the company's offerings and a passion for driving brand awareness. With a strong background in digital marketing strategies, he has an innate ability to connect with diverse audiences and effectively communicate product benefits.......